Showing posts with label food. Show all posts

Tuesday, March 26, 2013

A chicken education

The average American consumer may expect to open their carton of grocery-store eggs and see a dozen uniform specimens: all the same color, all the same ideal egg shape.

Me? I love opening a carton of farm-fresh eggs and seeing variety.

I stopped by my neighbor's farm on Friday to buy a couple dozen eggs from her, and an hour later, I'd met the hens who lay the eggs I was about to enjoy.

Each visit to this farm is an education. She keeps a couple different broods of chickens; one hardier, larger brood remains outdoors through more of the winter and produces the eggs I enjoy for breakfast. These chickens are large, and while she has many different breeds mixed together, they look like what I think of as a textbook chicken, with smooth feathers and an iconic silhouette.

All those different breeds mean that each egg is different. A carton of eggs includes at least six different shades of brown, in addition to some that are more rosy or even green, and each has its own unique shape.

My neighbor's second brood of chickens stays in a garage through most of the winter, where they're kept warm with heaters and lamps. I find these incredibly interesting—before last summer, I'd never seen chickens like Seramas and Silkies. They're each a third the size (or less) of the hardier egg-business birds outside. The Silkies are particularly striking: contrary to their name, instead of smooth, silky feathers, they instead look like they're covered in soft, fluffy fur. And they're covered in this plumage from the crowns of their heads to the tips of their toes. When you do get a look at the body beneath the feathers, their skin is black and their earlobes are royal blue. Silkies are also known for their sweet, loving temperaments.

A special treat for my visit: I got to hold a couple chicks that were only a week old. They fit in the palm of my hand and only weighed an ounce or two.

I'll be going back to the farm sometime this spring with my camera, for sure. I'd love to photograph these beautiful, interesting birds, in addition to the herd of alpacas that roams outside.

Until then, I'll just be enjoying some delicious omelettes and frittatas!

Wednesday, December 19, 2012

Eat your Brussels sprouts

As a child (okay, and as a teenager, too), I was one of those kids whose picky-eater tendencies give parents migraines.

We had to pick restaurants that served chicken nuggets or spaghetti—and they had to allow me to have the sauce on the side, in case it didn't taste like Prego.

I carried a Subway cold-cut sandwich into a Chinese restaurant on more than one occasion.

I ate a plain bagel and cream cheese for lunch every. single. day of fourth grade.

When I started college, I decided that I needed to learn how to like salad. Because it's one food that you can find at just about any restaurant, so it would ensure that I could eat out with friends.

So today, when I tell you this next statement, you understand how significant it is:

I love Brussels sprouts!


Many people are scarred by unfortunate experiences with these miniature cabbages. They tell sad tales of slimy, smelly, overcooked vegetables they were force-fed as a child. And I don't doubt that it happened. I don't have anything like that to relate—I just avoided vegetables in general. Thankfully, I now adore vegetables and am becoming a much more adventurous eater.

If you share a similar abhorrence, I ask you to give these beautiful vegetables one more chance—because if you roast these babies, they become sweet and crispy. No slime to be found.

Roasted Brussels Sprouts

1 lb. fresh Brussels sprouts
2 T Extra Virgin Olive Oil
1 t each Rosemary, Thyme, Oregano
1/4 t dried Garlic
(or your favorite blend of herbs)
Grated parmesan cheese

Preheat oven to 400°F. Spray a cookie sheet with nonstick spray.

Cut dry/hard stem ends (usually 1/4") off each sprout, and remove any wilted outer leaves. Slice each sprout in half, or quarters if they're as large as a golf ball. You want them to all be about the same size, so they'll cook in the same amount of time. 

Place cut sprouts in a gallon zip-top bag. Pour in olive oil and add herbs. Seal bag and toss/tumble the sprouts inside, ensuring all get coated with the oil and herbs. 

Dump bag of sprouts onto cookie sheet and spread out in an even single layer.

Bake for 15 minutes. Remove the pan and toss the sprouts. Bake for another 10-15 minutes until the edges brown and become crispy. A fork should easily slide into the core of a sprout.

Serve, sprinkling with parmesan cheese.

Delicious!

Thursday, November 22, 2012

Thankful

This Thanksgiving is an unusual one for me, because I'm literally between jobs.

After nearly four years at a full-service marketing and advertising agency, I turned in my key last Friday said goodbye to many friends. As I made that final commute home, I felt nothing but excitement about my next venture.

Because of that, this week is a true stay-cation: While taking time off at work is always great, this is one week off where I don't have to feel like I'm missing anything or getting behind. My brain is getting a chance to relax and shift gears before I start my new job in downtown Indianapolis next week.

So this year, I'm thankful for change. New opportunities. New adventures. New challenges. New environments. New things to learn. New friends to meet.

Oh, and new foods to try, like this persimmon that has been sitting, lonely, on my countertop for five days while I try to figure out what to do with a single persimmon. (Besides photograph it.)


I'm thankful for free days of few obligations and the chance to let my brain and my body de-stress. I'm thankful for excitement. I'm thankful for optimism.

I'm thankful for little pleasures, like hearing fresh cranberries *pop* while cooking my annual cranberry sauce for our family gathering tomorrow.


I'm thankful for a family who is safe, healthy, and will spend this holiday together. I'm thankful for the health and presence of my four-legged family members, too. Life would be incomplete without them.

I'm thankful for a growing extended family that will include a baby in 2013, making me an aunt in spirit (though not on paper).

I'm thankful I've had the chance to spend yet another year being thankful.

Happy Thanksgiving to you! And thank you for being here.

Thursday, July 5, 2012

Addicted to learning: classes at Frazee Gardens

When I want to learn something new or refine a skill, my first instinct is to look for a class I can take. Some people learn from a book, others from watching a video, but I love taking classes. Outside of the standard school routine, I've taken classes on photography, cooking—including basic knife skills and soaking/sprouting—jewelry making, swimming... I'm addicted to learning.

For my latest post on the HCCVB blog, I took a class at Frazee Gardens, a local garden, landscape and gift shop in Brownsburg. I chose one that focused on growing and using lavender and roses. 


Frazee Gardens offers a variety of classes and events throughout the year. Past classes have included themed planters with ingredients for homemade salsa or pizza; pressed-flower picture frames; bonsai trees; and butterfly habitats.

In Lavender and Roses, Dottie shared tips on growing lavender, how to harvest the flowers, where to dry rose petals, and what to look for in a perfect rose hip. After we learned how to cultivate our own raw materials, we sampled cookies and dove into making sachets, lotion, candles, potpourri and soap. Read more...

Thursday, June 21, 2012

San Diego Zoo and the best Italian meal I've ever had

I was a kid whose television entertainment was heavily weighted toward PBS: Sesame Street, Mr. Rodger's Neighborhood, Reading Rainbow, Wishbone, 3-2-1 Contact, you name it. And when I think of the animal-education segments on those shows, it seemed like the San Diego Zoo was always featured as the go-to organization for experts. So when I got the chance to spend time in San Diego, visiting that famed zoo was near the top of my list of must-do activities.
And boy, is it a zoo. You can definitely spend most or all of a day exploring it, especially if the weather is nice and your companions are up for walking and have long attention spans. Our weather was pretty crummy: the temperature didn't get above 61°F, and it stayed gray and overcast all day. I was cold enough to contemplate buying a sweatshirt in the gift shop, but I ended up toughing it out.
The Zoo is definitely built to take full advantage of San Diego's (usually) nice weather: all exhibits were outdoors. Having visited the Indianapolis Zoo many times over the years, which encloses many of its exhibits indoors (i.e., Deserts Building, Oceans Building) to enable year-round visitation, this definitely struck me as different. Even all of the restaurants and cafes were outdoors, which on a chilly day when you're looking to get warm was a little inconvenient.
I also noticed that the Zoo features primarily land (and air) animals, with very few water-centric creature exhibits. I wonder why? Could it be because of the area's naturally dry climate, or perhaps because of its proximity to water-focused SeaWorld?
One exhibit I found particularly interesting blended exotic and domestic animals. The Zoo has at least two cheetahs, and each of them has a domestic dog buddy—an "animal ambassador"—in the exhibit with them. They've found that when raised together from a young age, cheetahs and dogs can bond very well, and the dogs help to keep the cheetahs calm. They all looked pretty chill to me!

I think this was also the first time I've seen a peacock displaying its tail in full glory. He seemed like he might have been a little confused, though, because he spent most of his time flirting with the wall behind him, then fending off the native ducks between us. Confused or not, he made quite a statement.
The giant pandas were definitely the headlining act of this show. They're the only ones in captivity in the United States, so I did really enjoy seeing them. They had two males out for us to see, and a female off-exhibit because they were monitoring her to see if she's pregnant.

These two pandas were much smaller than I pictured. When I hear "giant panda," I picture a bear about the size of a grizzly bear or polar bear. But these were much, much smaller (and I do think they're full-grown), and looked like they'd be small enough to just about sit on your lap.

One of the pandas was sleeping, but the second guy looked like he was enjoying watching us as much as we enjoyed watching him. That, or he was so oblivious to visitors anymore that he was just chilling and enjoying his bamboo.
We called it a day around 4:30, dragged our tired feet back to the car, and warmed up. For dinner, we ventured into San Diego's Little Italy. When I make it back to San Diego again, this is an area that I really want to spend more time exploring.

The area felt truly authentic, especially owing to the old men calling across the street to each other in Italian. We read in a blog post on Design*Sponge that you could pretty much choose any Italian restaurant on India Street and get a great meal. So we consulted our Yelp apps, looked at some menus, and picked one that looked good, Trattoria Fantastica. And let me tell you, this was the best Italian meal I have ever had. No joke. And I'm a girl who loves her Italian food, and always has. I had the Contadina, and my friend, Sarah Lynn, had the Lasagna. All through dinner, we kept pausing in our conversation to say things like, "Oh my god, this is so good!" We both cleaned our plates.

After dinner, we walked down the street a bit and saw some great-looking local shops that had closed for the evening, and we wished we'd discovered them earlier. I'll just have to go back!

The finale for the great day and evening—which happened to also be my birthday—was a treat of gelato right next door to the restaurant. Oh so good.
The weather in San Diego may not have been ideal, but I had a fantastic time and enjoyed exploring the area. I can't wait to go back and see more of California.

Thursday, June 14, 2012

Wine tasting in Temecula

Pure vacation time begins!

Taking advantage of my work trip to California, I extended my stay by a few days, and my friend Sarah Lynn flew out and joined me. It worked out perfectly, because she was planning to fly to Los Angeles the following week for her husband's grandmother's 90th birthday gathering, so she came out early so we could explore southern California together.

Neither of us had been to San Diego before, so we focused our four days there. We chose to take an inland, scenic route from Newport Beach to San Diego, which took us through Temecula.


View Larger Map
It was a beautiful, winding drive through Cleveland National Forest. It really hit home for me how susceptible to wildfires this landscape is. The whole area of southern California I saw was much more arid than I expected, especially around San Diego. I didn't expect to see cacti unless I were to drive inland toward Death Valley, but they were really all over the place.

While the altitude of this particular "national forest" wasn't very high, the quantity of trees were far from my idea of a forest, and the landscape was populated more by scrub-type vegetation.
The weather inland differs dramatically from the weather along the coast of California. Our drive to Temecula was the hottest we experienced, with a high temperature in the upper 80s. I hear so many people say, "Oh, but it's a dry heat, it's not as bad," but I tell you what—it was hot!
Temecula is a town of about 100,000, but it was the local wine country that encouraged us to make a stop there. Last summer, on my trip to Traverse City, Mich. with Mom, I did my first wine-tasting—so I was interested to see how it compared to a California experience.

The area promotes at least 35 wineries—we stopped at four. That was all we could handle! The four we visited:
I much prefer white wines over red, so that's what I focused my tasting on. I found a couple Gewurztraminers I liked, and an Orange Moscato at Danza del Sol, but nothing else even came close to encouraging me to buy some. And surprisingly enough, I liked the lauded South Coast Winery the least. Part of it was the atmosphere, part was the service, but I actually didn't find the wine I tried to be anything spectacular.

After a day of sweating and sampling wine, we continued our journey south, toward our hotel near Escondido. We'd heard from friends that roadside fruit and nut stands and avocado groves were plentiful outside Escondido, and since we both are big fans of fresh, local food, we really wanted to see this for ourselves.

I didn't get to see any avocado groves—and I was curious to see avocados in their element—but I certainly saw the plentiful evidence: Sarah Lynn and I were shocked to see roadside stand after stand advertising 25 avocados for $5.00. That's $0.20 each! I'm excited when we can find avocados for $1.00 each in Indiana, so this was unbelievable. Neither of us had a way to really transport or consume dozens of avocados back to Indiana, but we certainly laughed about the possibilities for selling them at a profit!

And let me tell you, we had fresh avocado on everything. Omelettes were topped with it. Salads featured it. Even Subway, which in some Indiana locations offers an avocado spread as a sandwich topping, in southern California had fresh, whole avocado on hand to slice individually for your order. I definitely enjoyed that!

Up next: La Jolla, which boasts some of the most expensive real estate in the country.

Monday, January 2, 2012

Warm salads: my go-to cold-weather meal

Happy New Year! It's hard to believe that we've begun yet another year on the calendar, and it's time to get back to work after the holidays.

Today I want to share with you one of my favorite go-to meals for this time of year. It's a versatile dish I affectionately call a warm salad.

I started eating these a couple years ago when I found this recipe for a Cous Cous Salad with Winter Squash and Cranberries at TheKitchn. To be honest, I've never actually made the recipe exactly as written (which is not uncommon for me). But it's endlessly variable when you step back and look at the essential ingredients. What you'll need:
  • A whole grain, to form your base. In the original recipe, it's cous cous. I have brown rice a lot, and I've also had this with quinoa (with great success), buckwheat and millet, to name a few. Pick your favorite and go with it. 
  • A vegetable. Lately I've been using lots of sweet potatoes/yams, but I highly recommend butternut squash and beets, too. I've had it with broccoli, cauliflower, and other squashes, as well. 
  • Protein, usually in the form of nuts or beans. Again, pick your favorite, or what sounds good that day, and go with it. 
  • Fruit, whether dried or fresh.
  • A little cheese, if you like. Feta is my favorite.
  • And dressing. The original recipe has a dressing included, but I most often have this with an Italian vinaigrette. 
Once you have all those items on hand, you're ready to get to work! Here's my method:

Whole grain: I like to fix a batch of whole grain and have enough on hand for several meals during the week. Try this super-easy baked brown rice from Alton Brown. It's amazing. You'll need a 1/2 cup or so of cooked grain for one serving.

Next, add your vegetable. Sweet potatoes and yams are easily cooked one at a time in the microwave like a baked potato. Depending on the size, I usually use about half of one sweet potato for one serving. Roasted beets are great, too. Whatever you pick, cook it (or warm up your leftovers) and add it to the whole grain.
Next, add your fruit. Apples are readily available right now, and they make a wonderful combination with both sweet potatoes and beets. I'm generous with the apples, so I usually dice one small apple for one serving.

Finally, add your protein (Whole Foods' wonderful raw cashews pictured here), cheese, if you like, and dressing.
I mentioned that my favorite cheese to use is feta. In the picture above, I've used feta cheese made from goat's milk. For the last year, I've reduced my dairy intake, and in many cases (milk in my tea, little bits of cheese), I reach for goat's milk as an alternative. The nutritionist I worked with last year recommended it for me primarily because you'll find lower levels of hormones in goat's milk as compared to traditional cow's milk. I've gotten used to it and really like this feta, which I get at Whole Foods.
Voila! A versatile, warm, satisfying meal that is easy to throw together on a week night after work. I made this for my mom a couple months ago for the first time, and she's now hooked, too. Enjoy!

Monday, December 5, 2011

Fresh pomegranates in season

Let's start this post with a little two-question poll:

1. Have you ever bought, opened, and eaten a fresh pomegranate?
a. Yes
b. No
c. Maybe, but I'm so consumed with holiday stress that I can't remember what I had for breakfast this morning.

2. If you have at least attempted to open and eat a fresh pomegranate, did you think it was (multiple answers are allowed):
a. Interesting, fun, intriguing
b. Tasty
c. More work than it was worth
d. A mess that left me and/or my kitchen covered in red juice
e. Too intimidating; it went bad before I got to it

Until last year, I would have answered B to number one and E to number two. Then, after watching an inspiring episode (as I find so many to be!) of Alton Brown's Good Eats, I braved the task of opening this mysterious red fruit and was hooked.

Many people just associate pomegranates with the curvy bottles of juice on the grocery shelf but have never had fresh arils (unless perhaps they came atop a fancy dish at a fancy restaurant). I was talking to a desk-neighbor at work one day last week, and she offhandedly mentioned that she doesn't like fresh pomegranates and finds them to be more work than they're worth.

Here's my trick: I buy multiples at a time (usually about three), spend a few minutes opening all of them up at once, then store the separated arils in the fridge for easy access. Stored in an airtight container with a damp paper towel on top, the arils will keep for several weeks.

You can juice them and make your own fresh pomegranate juice (I haven't taken it that far), cook with them (haven't honestly done that yet, either), or just enjoy them in their delicious fresh state. My favorite ways to use them involve sprinkling handfuls on:
- Salads
- Coleslaw
- Greek yogurt
- Ice cream

If you've never tried a fresh pomegranate before, do it! They're in season now and can be easily found at your neighborhood grocery store.

If you have tried them, what did you think? What are your favorite ways to use or eat them?

Monday, September 26, 2011

Healthy, fresh, oh-so-good apple butter

Perfect, sweet, local Cortland apples. Good enough to eat raw every single day, but as I mentioned in my last post, I wanted to try my hand at apple butter.

I'd found a recipe on one of my favorite healthy-eating blogs (Eating Bird Food, which I've mentioned here before), and it sounded so good, so fall-like, and so easy, that I had to try it.

The only part that made me a little nervous was that it called for the apples to be cooked in the crock pot for 15 hours. Fifteen?! I cross-referenced the idea in a Fix-It and Forget-It cookbook, and sure enough, all apple butter recipes called for it to be cooked for 15-18 hours. Wow! Knowing my crock pot tends to run a little hot, I was still nervous, but I put on my game face and gave it a try.

The recipe is very simple and very easy. I was especially drawn to the fact that it has no added sugar, so it's very healthy.

Healthy Homemade Apple Butter
From Eating Bird Food

Ingredients:
10 medium-sized apples (I used Cortland. Pick a sweet variety, since there's no extra sugar.)
2 cups unsweetened apple juice (I used R.W. Knudsen's organic 100% apple juice)
1/4 cup water
1/4 apple cider vinegar
1 T cinnamon
1/2 t pure vanilla extract
1/4 t ground cloves
1/4 t ground nutmeg
pinch of sea salt

1. Place cored and sliced apples (not peeled—easy!) into a crock pot/slow cooker. (Mine's a smaller-variety crock pot.)
2. Pour juice on top of the sliced apples. Add water, vinegar, and spices. Stir all ingredients together, cover the pot, and let it cook on low for 15 hours.
3. The liquid and the apples will reduce to about 1/2 their original volume. They'll be very soft and dark. Turn the crock pot off and let it cool down for about 30 minutes. Transfer the mixture to a blender and blend until completely smooth.
4. Let it cool, then transfer into storage containers. My batch only made about 2 full pints of apple butter, so it's not a huge recipe. Store in the fridge for a few weeks, or freeze for later!

As I said, my crockpot is on the smaller side, so 10 apples filled it.
I started the batch at about 5:00 p.m. on Saturday evening, so it finished at 8:00 a.m. Sunday morning. It smelled wonderfully after just an hour or two, so it really started driving me crazy. I always get a little nervous about letting something cook overnight, wondering what the state of my kitchen counter will be when I wake up, and that, combined with the scent that filled the house, meant I had a really restless night of sleep. I was awake every two hours.

Thankfully, the smoke alarm never went off, everything stayed in the pot, and it turned out perfectly. (Hooray!) This is how the apples looked when I woke up:
After a quick whir in the blender, I had two pints of perfect, delicious, healthy apple butter. It's a little more tart than what you'll find in a store, but it really doesn't need any sugar added. By choosing a sweet variety of apple, it's plenty sweet on its own. 
It's so good, I have to really resist standing by the fridge and just eating it out of the jar with a spoon.
Now I'm trying to think of all the ways I can eat it. Spreading it on toast or biscuits is an easy answer. I stirred it into my hot cereal this morning, and that worked very well.

Any other suggestions? How do you like to eat apple butter?

Saturday, September 24, 2011

My favorite apple orchard

Welcome to fall! One thing I always look forward to doing at this time of year is going and getting fresh apples from my favorite local orchard: Beasley's Orchard in Danville.
It was because of Beasley's that I first discovered Gala apples, and they've become my all-time favorite. This year I tried a new variety, though, and it comes in at a very close second: Cortland.

Beasley's Orchard has a market inside a Civil War-era barn, and you can smell the sweet apples and spices before you walk in the door.
They go far beyond selling apples. You'll find everything from apple and pumpkin butter to local honey, maple syrup, popcorn, pumpkins, squash, and fresh vegetables. I made a trip today and couldn't resist getting a pint of pumpkin butter with my 1/2 peck of Cortlands.
If you're looking to support a local food producer—and maybe want a little fall field trip—I highly recommend you go for a visit.

I have my first-ever batch of apple butter cooking in my crock pot as I type. I'll share the results (and the recipe, if it's good) soon!

Saturday, August 27, 2011

Cinnamon Raisin Almond Butter

Almonds and I have a bit of a love-hate relationship. The love: I enjoy them by themselves as a snack, in my granola, in a snack bar, mixed in my oatmeal—those instances where they get to shine and be their independent little almond selves.

But the hate: I have yet to find an almond milk that I like. I have a hunch that a sugared-up chocolatey version would be right up my alley, but that kind of defeats the purpose, don't you think? Also, I've tried a store-bought variety of almond butter, and I hated it so much after the first bite that I had to give the rest of the jar to a friend so it wouldn't just go to waste in my fridge.

Hmm. Almonds are touted as being one of the very best nuts out there, with dozens of healthy benefits coming your way for eating them. So I'm determined to find more ways to like them!

Enter: homemade almond butter. I've been curious to try making my own, in the hopes that I'd like my own concoction better than something I'd buy at the grocery store. I love my homemade cashew butter (courtesy of the great Alton Brown), and I love that sense of victory you get when you successfully make something yourself that you only thought to buy before.

I found this recipe for Cinnamon Raisin Almond Butter two ways (a mention on Tasty Kitchen, and it's from a food blogger I like—Eating Bird Food), and the title was just calling my name. What a tasty way to venture into homemade almond butter! It was a very simple recipe:

Cinnamon Raisin Almond Butter
From Eating Bird Food

Ingredients:
2 cups Almonds
1/4 cup Raisins
1 t. Cinnamon
1 t. Vanilla bean paste or vanilla extract
* Water or oil - my addition, see notes below.

1. Preheat oven to 350°F. Spread almonds on a 9x13" baking sheet and bake for 10-12 minutes. Cool for 20 minutes or so.
2. Place roasted almonds in a food processor and process for 10 minutes (yep, 10 minutes), occasionally scraping down the sides.
3. Add remaining ingredients and begin processing again.
4. Process until smooth, occasionally scraping down the sides. About 3-5 more minutes.
*5. Drizzle in water or oil in small bits while processing, if almond butter hasn't reached your desired creaminess after 15+ minutes.

I didn't feel like heating up the oven, so I toasted my almonds in the microwave for a few minutes instead. Spread them in a single layer on a microwave-safe plate, and microwave on high in one-minute intervals. My instinct is the only real difference it makes is in flavor, so if you prefer the taste of raw almonds, by all means, skip that step!
As the almonds processed, they became more powdery or almond-meal-like than creamy. When I first started, I was skeptical of the "process for 10 minutes" direction, but even after 10 minutes, my almonds still weren't creamy:
When compared to the other nuts in the spectrum of nuts, seeds, and peanuts, one reason almonds are a top choice for many is the lower fat content, which I'm sure is because they're lower in natural oils. So it would make sense that it would take a little more effort to make a creamy almond butter.

But before I started making alterations to the recipe, I decided to see it through to the end and see how the raisins might change things. So in went the raisins, cinnamon and vanilla extract:
After another 7ish minutes of whirring, it still hadn't reached anything close to what I'd consider "creamy." Time to start altering.

I had some walnut oil on hand specifically for making homemade cashew butter, so I drizzled in about a tablespoon (a little at a time over a few minutes) while it was processing. It helped a lot, and it got me to this stage:
And there I stopped. It was spreadable and quite tasty! You may also be able to use water instead of oil to help it get creamy, and I've seen recipes call for that. If, after I've eaten all this, I want to make it again, I may give that a try. If you're going to go for an oil, I'd recommend a nut oil like walnut oil, or something without much of its own flavor, like canola oil.

I also don't know if almonds vary greatly, or how roasting them in the oven would have changed things. Judging by the comments and reviews on Tasty Kitchen, achieving creaminess is a common challenge.

I'll be storing mine in the fridge, since that's Alton Brown's recommendation for my beloved cashew butter. Yum!

Have you made your own almond butter? Any tips?

Tuesday, June 21, 2011

An herb garden in the making

An experiment in the making: my first herb garden.

I mentioned in my last post that I have a handful of different herbs growing (or attempting to grow) in pots on my deck. I don't have much experience with growing potted plants (heck, I don't have a lot of experience growing plants in the ground, either!), so I'm learning as I go.

I took a cooking class at Kiss Z Cook earlier this spring called "Cooking with Fresh Herbs," in the hopes that it would inspire me and teach me something about how to use my coming crops.

I'll just say that it didn't meet my expectations. If I'd been out to just cook some recipes in a group setting, I'd have considered it a successful evening. But I was looking for more educational, informational instruction, and I didn't get that at all.

The good news: I paid for the class with a Groupon that saved me more than 50%, so that helped to lessen my disappointment.

Ironically, just a couple weeks later, I went to a free (magic word) gardening fair at the county fairgrounds, hosted by the local Master Gardener's association, and I specifically went at a time when they were presenting a 30-minute session on growing, preserving, and using fresh herbs. This free session knocked the socks off the expensive cooking class. The presenter spoke completely without notes, purely from years of experience, and I took several pages of notes on her recommendations.

Fast forward to mid June, and my basil and oregano look great, but the cilantro and parsley aren't flourishing quite as much. I do love walking past them every day on my way to and from work, checking in to see how things are doing. I've especially enjoyed seeing the pattern in which the basil leaves grow. Leaves appear in 180° pairs, then the next pair grows on top of the previous pair -- but at a perfect 90° angle. I love the order and symmetry of it.

This is actually the basil pot where my toad couple spent the evening last week. I haven't seen the two of them together again (hope they're not on the outs), but their visit doesn't seem to have hampered this basil!

Finally, this cilantro seedling is s-l-o-w-l-y making progress. I like how delicate it is at this stage, yet completely recognizable.

I'm going to keep coaxing these along, and I can't wait to use some. I want to make pesto, salsa...

Are you growing any herbs? What are your favorite ways to use them?

Monday, June 13, 2011

Unexpected garden visitors

Four-legged visitors are usually unwelcome guests in a garden, but I have one that I have to admit I'm enjoying having around.

I've started my first herb garden this year, in pots on my deck. I'm growing oregano, basil, flat-leaf parsley, and cilantro. I tried starting some from seeds indoors, but I've since learned that my house just doesn't quite get enough light to nurture hearty growth. The basil was the only start worth keeping.

Seeds are cheap, though, and it was a fun learning experience, even if it essentially failed. I got a start of oregano from my aunt's massive plant, and I bought new basil, cilantro and parsley plants at area farmer's markets and garden centers. The still-living basil starts got transplanted into a couple pots (which, if they all take off, will end up giving me enough basil to last for about five years).

Not 48 hours after I'd potted all my herbs and settled them into their new homes on my deck, I noticed that something had been digging in the dirt around the cilantro. Thinking, at first, that it was a chipmunk (grrr), I was pleasantly surprised when I went to water the plants the next day and discovered what it was: a toad! He was buried in the dirt up to his eyeballs. It didn't look like he'd disturbed the roots, though, so I left him alone (hoping he'd feast on more than his share of mosquitoes).

After some further research into how much sunlight each plant enjoys, I shifted the pots around to better maximize the sunlight in this space. It seemed to have disturbed my toad, though, because I didn't see him again for a week or so (and he'd been nestled into his cilantro home each morning and evening).


Not to fear, though, because apparently it takes more than that to scare my toad away from his new home. Tonight, I got home from a bike ride and found him in a new pot -- a pot that is essentially in the same place as his old cilantro home.

And he'd brought a friend. Don't they look cozy?


He probably feels like he's been downsized, since this pot is in the same place, and it's smaller than the previous one. Unfortunately this couple has now definitely disturbed the roots of my basil seedlings... but since I have two others doing fine, I'm thinking I'll just leave them be.

My other surprise find tonight was this:


It's a squash plant. Growing in my compost heap. And I did not plant it there on purpose.

Actually, let me clarify: it's closer to 50 squash plants growing in my compost heap.

I'm not sure what it is yet, but it's blooming! I tossed some gourds out there at the end of last fall, so we'll see if that's the winner! Last year I found a bundle of tomato plants in this same spot.

This may be the easiest kind of gardening around.

Thursday, June 9, 2011

Homemade granola

Meet my latest cooking kick: homemade granola.

Like so many other foods, once you've tasted the wonder of your own, personally customized, homemade granola, you'll find it hard to return to the boxed packages on the grocery shelf.

This isn't the first time I've had homemade granola, but it's my first attempt of making it myself. The process started in 2008 when Mom and I ventured to Colorado to visit Chase during his summer outside of Steamboat Springs. On our one full day with him, he took us to his favorite restaurant in Steamboat, Freshies, a place that offered house-made granola on the menu.

It was incredible. When we returned from that trip, Mom spent quite a bit of time researching recipes and tweaking multiple batches, trying to replicate the wonder of the Freshies granola. She's passed the recipe on to me, but this summer is the first time I've tried making it myself.

I honestly had forgotten that I already had the recipe in my possession, so I pored over several recipes before jumping in. One thing that makes Mom's granola unique is the fact that it's cooked in the crock pot. You'll find many recipes out there for crockpot granola, but it's more common to find recipes carried out in the oven.

But for as many recipes that there are, you'll find just as many stories of, "Woe is me, you won't believe how many batches of granola I've burned before finally figuring out how to do it in my own oven." I wanted to avoid this learning curve as much as I could, and having seen how easy it is to do in the crockpot (even though the whole process takes longer), that's what I wanted to do.

Alas, woe is me, it's still easy to burn granola in the crockpot.

Bummer.

If you search for crockpot granola recipes, you'll find widely varying temperature and cooking time recommendations (Some will tell you 5-7 hours on high. Huh?!). After having made about four complete batches in the last month (two in one weekend), I can tell you that when it comes to my crockpot, two hours on low is all it takes.

Once you know that, this is an incredibly easy thing to make, and the recipe is entirely flexible. Dump everything in, stir it up, cook it on low, and stir it every 30 minutes. That's it. The result is a looser granola than you might be used to; it's not clumpy, though there may be a way to do it. The flavor is great, though, so I don't really miss the clusters.

I made a batch this past weekend that has been my best yet. This version was loosely based on a recipe from Smitten Kitchen (great cooking blog, by the way), with some of Mom's tried-and-true flair thrown in. Here's my latest version:

Homemade Granola
Loosely based on Smitten Kitchen and Mom's Amazing Personal Recipe
Serving size: 1/2 cup

3 cups old-fashioned rolled oats
1 cup flaked coconut (I used unsweetened)
1/4 cup vegetable oil
Approximately 1 cup of your choice mix of chopped nuts and seeds (this version used almonds, walnuts, pecans, and sunflower seeds)
1/4 cup maple syrup (or honey)
Pinch of cinnamon
Pinch of salt
1 Tablespoon frozen OJ concentrate

I sprayed the inside of my crockpot with cooking spray first, but I'm not sure that it really did anything.

Dump everything into your crockpot. Stir to mix well and distribute the wet ingredients.


Cover, placing a paper towel across the top between the crock and the lid to catch condensation and keep it from getting back into your granola. Cook on low for two hours or so, depending on your crockpot, stirring every 30 minutes.

It's done when the granola is fragrant and golden brown. After you've turned off the crock pot, it will continue to dry and crisp up, getting a little bit darker (so it's okay to think you may have slightly undercooked it). Let it cool, then store in an airtight container at room temperature for a couple weeks or in the freezer indefinitely.


As you can see from these photos, the pre-cooking and post-cooking visual difference isn't huge.

Many recipes call for adding dried fruit after the granola has cooled, but I haven't done that yet. It doesn't really need it, though I know it would be wonderful, and honestly, I find myself forgetting to add it!

I love having this for breakfast with Greek yogurt and fresh fruit. We've had some unseasonably hot weather recently, so I've been enjoying more cold smoothies for breakfast -- and I've found that pouring the smoothie into a bowl (a very basic, bare-bones fruit smoothie), topping it with granola and eating it with a spoon is wonderful. You can also eat it like cold cereal with your favorite milk, or add some milk and warm it up in the microwave.

Now I just have to eat through this batch so I can start making some more...

Sunday, May 1, 2011

Homemade snack bars

What did we do before the invention of individually packaged snack or granola bars? They've become a great, convenient staple for those of us who need something to toss in our purses, backpacks, or desk drawers.

But finding a good grab-and-go snack with few, quality ingredients can be tough. Read the list of ingredients on most packages of granola bars, and you have to wonder how they get all the type to fit on the small wrapper.

Because of that, I love Larabars. True, their calorie tally is higher than many other snack bars, but take a look at the ingredients and you'll understand why: the list includes as few as two and no more than nine items. And they're all common, household ingredients that you can usually find in your own pantry.

Generally, my only obstacle to not having more of them around is that they're a little on the pricier side. They're generally sold individually, so I find it to be a snack I savor and consider a treat.

But why not try making your own?

In the class from Fermenti Artisan that I took in February -- the class about soaking and sprouting your foods before cooking and eating them -- one of the recipes we made in class was a model of a homemade Larabar. Your ingredients are really up to you! These guys had two general guidelines for when you develop your own mix: use stickier kinds of dried fruits for the best results (since they act as the glue that holds everything together), and use about twice the quantity of sticky fruit to dry ingredients.

The rest is up to you!

I made my own this weekend for the first time, modeled after Larabar's "Cinnamon Roll" flavor because I had everything on hand. My approximate quantities were:


1 lb sticky fruit (dates and raisins, for me)
1/2 lb nuts (walnuts, almonds and raw cashews)
1/2 t cinnamon

Beyond that, I had slightly more weight in dates than raisins, and my mix of nuts was about 2 parts walnuts, 1 part almonds, and 1 part raw cashews. How do you do it? Here are the Fermenti Artisan guys' directions, with my notes:

1. Chop by hand, or pulse in a food processor (always my preference), all the nuts until they're in small, coarse pieces. Dump into a large mixing bowl.
2. Puree in the food processor, or chop by hand and mix thoroughly, your dried fruits. Dump them into the bowl with the nuts.
3. Blend in your spices, using a spoon or your hands to thoroughly mash everything together. My hands were definitely the easier method here.
4. Grease a glass baking dish (mine was 8x8" square) with a small amount of coconut oil to prevent the mixture from sticking. I used wax paper instead, because it makes for easier cleanup and doesn't add any additional oil to the recipe.
5. Press the fruit and nut mixture firmly into the dish, smoothing out to the edges.
6. Allow to sit for at least 2 hours before cutting into bars, and you can put it into the fridge for a short time to help it set.
7. Cut into bars and wrap into individually packaged snack bars. Store them at room temperature, or in the fridge in the warmer months. They'll keep for a month or so, after which you just risk them drying out. Enjoy! The potential combinations of flavors are endless.

I calculated out the nutritional info for my recipe, to see about how many bars I should (and could reasonably) cut my recipe into. Twelve became my lucky number.

Nutritional info per bar: 12 bars in the above recipe
235 calories
11g fat
3.8 g fiber
25 g sugar
4g protein

I can't wait to try making more! Have you ever tried making your own snack bars?

Monday, April 25, 2011

New recipe: Purple Pesto Pasta

The number of blogs I follow continues to grow: I'm at 152, as of the writing of this sentence. (At this rate, it could change by the time I actually get to the bottom of the post.) Of those 152 blogs, 32 fall under my "Cooking and Food" category. I've printed off dozens of recipes that I want to try, and tonight I gave one of them a go: Purple Pesto Pasta. When I found it through a link on another blog (it's been long enough that I don't even remember which blog), I was so intrigued that I had to try it.

The ingredients are simple, and the prep and cooking time are, too: red cabbage, olive oil, garlic, sunflower seeds, salt, and pasta. That's it. A perfect weeknight post-work meal.

Here's the recipe:

----------

Purple pesto pasta (Red cabbage pesto)
You will need
1/4 head red cabbage, chopped coarsely
Several tablespoons olive oil (it will depend on how large your cabbage is)
2-3 cloves garlic, peeled
2 tablespoons raw sunflower seeds
Kosher salt
1 cup whole wheat penne (other pastas would work just fine)

Directions

Pulse cabbage, garlic, sunflower seeds and a few pinches of salt in food processor (it might work in blender, too–let me know if you try it).
Add olive oil in a thin stream through the food processor tube while pulsing, until the mixture forms a paste. (Because of cabbage’s texture, this will never reach the same pastiness of a basil pesto–as soon as it starts sticking together, you’re good.) Taste for salt, and add more if necessary.

Put a pot of water to boil. Cook penne in boiling water for 7 minutes or until al dente. Drain, reserving a bit of pasta water. Toss several spoonfuls of the purple pesto and pasta water with pasta in the still-warm pot. Top with toasted sunflower seeds (I also added some baby asparagus I had around, steamed).

Found on The Yellow House.

----------


My first challenge was a common one: adjust the recipe to serve one. I wasn't exactly sure how many servings this was supposed to make -- 2? 4? 6? 18? -- so that's where the guessing game began. My head of red cabbage was monstrous, so I cut off a chunk about 1" in thickness, 7" in diameter.

Next question: by how much should I reduce the garlic? I love garlic, so I wasn't afraid to have its flavor be a little on the strong side, so I used one average-sized clove.

I tossed that in the food processor with a tablespoon of raw sunflower seeds and a couple small pinches of kosher salt, pulsed it a few times, then slowly drizzled in about 1.5 Tablespoons of olive oil while I pulsed it some more.
It was beautiful! It looked perfect, just as the directions described. Meanwhile, I cooked 1 cup of whole-wheat pasta.

I tasted a spoonful of the purple pesto and was immediately hit by the strong garlic flavor -- but I was cool with it.

Did I mention that I hadn't looked at this recipe in a while? Yeah, well, I decided to be very generous with the amount of purple pesto on my pasta, since I couldn't remember the author's photo (and I was feeling pretty excited about my new dinner). Pesto, in general, is a fairly new experience for me. In my mind, this was more like a warm-salad-on-pasta dish than a pesto sauce.

Top it off with some sunflower seeds, and voila! A very colorful dinner.


So, how did it turn out in the end?

I consider it both a success and a failure.

I ate about 1/3 of it and had to stop. The garlic killed me. At first, it was fine, but the more I ate, the stronger it felt, and I started to think that if I kept going, I'd end up sick.

The idea itself, and the original recipe, were a success, and I'd definitely be up for trying it again. The failure was my own doing. Next time I'll drastically reduce the cabbage-to-pasta ratio, which will help spread the garlic love, and I'll also use less garlic for that amount of cabbage.

At least I won't have to worry about evil vampires visiting tonight.

Let me know if you give this a try!

Update 4/30/11: I made this again for dinner last night, determined to get it right. I used about the same amount of cabbage, a smaller clove of garlic, and everything else the same. But I only mixed a couple spoonfuls of the purple pesto into my pasta, and it was much better! And now I have more to enjoy over the next couple days. Success!

Sunday, April 10, 2011

A craving for muffins

I've been craving good muffins for weeks. Weeks. Why haven't I made any before now?

I also need to do some baking, because I've been accumulating supplies and I don't think I can fit anything more in my pantry.

Sounds to me like it's time to fire up the stand mixer, heat up the oven, and break in my muffin pan!

"Good muffins" to me need to have two key factors: 1) They need to be reasonably good for me, so I'm not feeling guilty about the fact that I shouldn't be eating them, and 2) they need to be tasty to really satisfy that hunger in the first place. If they taste like cardboard, then what's the point of eating them at all?

It's a tough equation.

I chose a recipe by Alton Brown (who I'm loving more and more with every recipe I make) that I found in his Good Eats 2 cookbook. I can't seem to follow a recipe without making any changes, so I made some substitutions. Here's his original recipe:

Blueberry Muffins
Makes 12-15 muffins

7 ounces sugar
1/2 cup vegetable oil
1 large egg
1 cup plain yogurt
1 teaspoon vanilla extract
1/2 teaspoon orange zest, grated
12.5 ounces all-purpose flour
2 teaspoons baking powder
1 teaspoon baking soda
1 heavy pinch kosher salt
8 ounces fresh blueberries

And I substituted:
1/2 cup applesauce instead of oil
1 cup plain Greek yogurt instead of standard yogurt
12.5 ounces whole wheat flour instead of all-purpose white
8 ounces frozen blueberries instead of fresh (and according to Alton, you should not thaw them out before adding them to the mix -- dump them in frozen)

Directions:
1. Heat the oven to 350°F*. Spray a standard 12-cup muffin pan with nonstick spray and set aside.
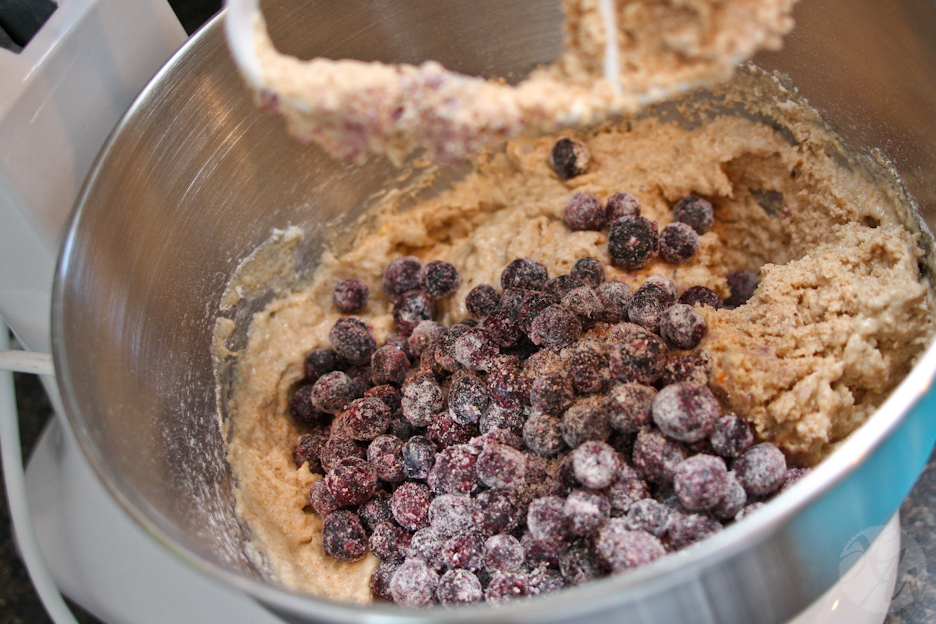
2. Whisk the sugar, oil, egg, yogurt, vanilla and zest together in bowl A. Sift together the flour, baking powder, baking soda, and salt into bowl B (which by the way should be the larger of the two bowls). Toss the berries with one tablespoon of this dry mixture and set aside.


3. Dump bowl A into bowl B. Stir it a dozen or so times, add 6 ounces of the berries to the batter and stir three more times, then just walk away for 1 minute.


4. Use a disher to spoon 1/4 cup of batter into each hole of the muffin pan.
5. Broadcast the remaining 2 ounces of berries on top of the muffins and press down on them ever so slightly.
6. Let the muffins sit for 3 minutes on the counter.

 
7. Bake on the middle rack of the oven for 25 to 30 minutes, until the internal temperature reaches 210°F or a toothpick inserted into the center of a muffin comes out clean. If your oven has a history of uneven baking, rotate the pan halfway through.*

 
8. Remove from the oven. Cover with a clean dish towel and flip the muffins out so that the bottoms are facing up.
9. Serve immediately or store in an airtight container for 2 to 3 days.

* I actually baked mine at 400°F for about 20 minutes, inspired by a post on TheKitchn that suggested how you can get a higher, more domed muffin top by increasing the heat.

They turned out wonderfully. They're healthier than most any giant muffin you'll find at your favorite coffee shop, so it's a no-guilt treat! I'm going to keep a few fresh on hand to eat in the next few days, and the rest are going in the freezer for many breakfasts to come. Alton Brown once again pulls through for me and offers up a fantastic recipe.